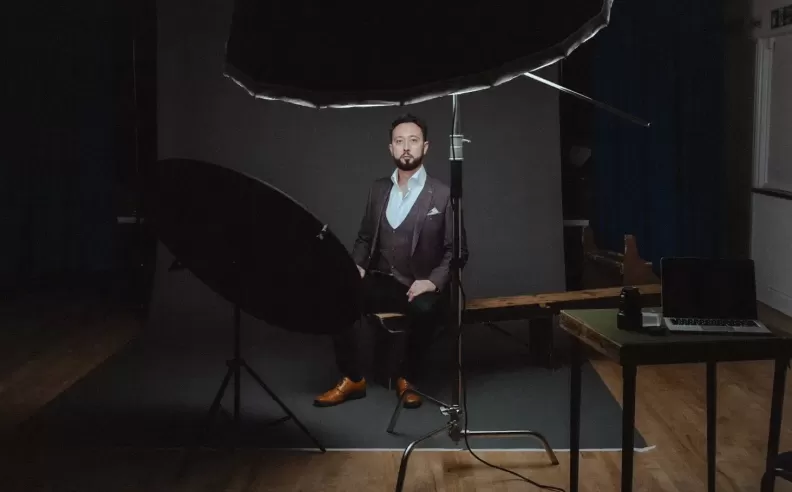
Shooting professional portraits can seem daunting, but with the right lighting setup, you can achieve stunning results. Australian music photographer PJ Pantelis offers a straightforward 7-minute guide on how to use 2 lights and a reflector to create a professionally-lit headshot. Even if portrait photography isn’t your primary focus, this tutorial provides valuable insights into working with light.
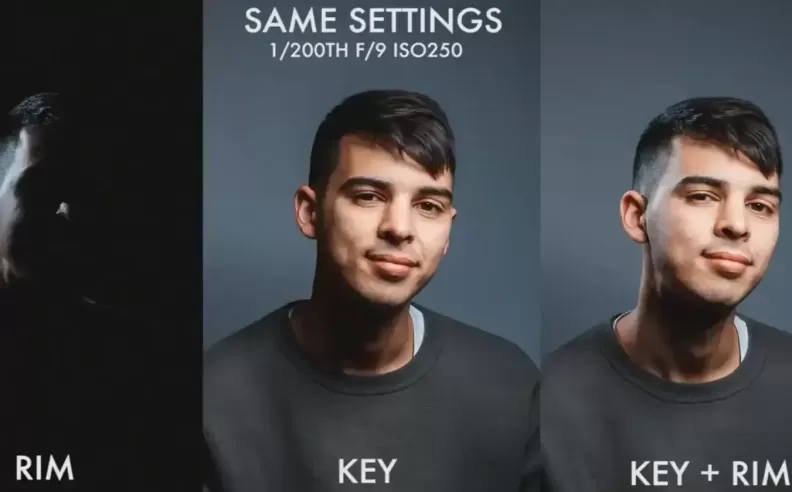
The basic 3-point lighting setup, often referred to as 3PL, involves three key components: a key light, a rim light, and a fill light. The key light is the primary light source, placed in front and to the right of the subject. This light is responsible for illuminating the subject. The rim light is positioned to the left and behind the subject, adding dimension and depth to the image. The fill light, in this case, a silver reflector, is placed in front of the subject to control and soften the shadows cast by the key light.

Pantelis begins by showing how a portrait looks with only ambient lighting, highlighting the natural shadows and lack of depth. He then introduces the key light, demonstrating its impact on the subject by creating a well-lit focal point. Next, he adds the rim light, which enhances the separation between the subject and the background. Finally, the silver reflector is used to fill in the shadows under the subject’s face, creating a balanced and glamorous effect. This layered approach clearly illustrates how each light contributes to the final image.
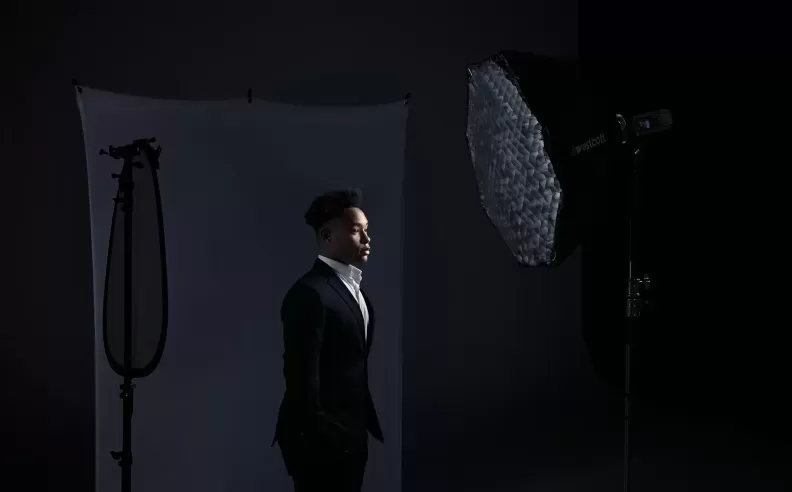
The rim light plays a crucial role in adding dimension to the portrait. Positioned behind the subject, it creates a subtle outline that separates the subject from the background. This light is essential for preventing the subject from blending into the backdrop, making the portrait more dynamic and visually appealing. Pantelis shows how the rim light, when combined with the key light, enhances the overall depth of the image.

The reflector acts as a fill light, bouncing light back onto the subject to soften shadows and reduce harsh contrasts. In Pantelis' setup, the silver reflector is strategically placed in front of the subject. This placement allows it to reflect the key light, filling in shadows and creating a more polished and professional look. The use of a reflector is a simple yet effective way to achieve a balanced lighting setup without the need for additional light sources.
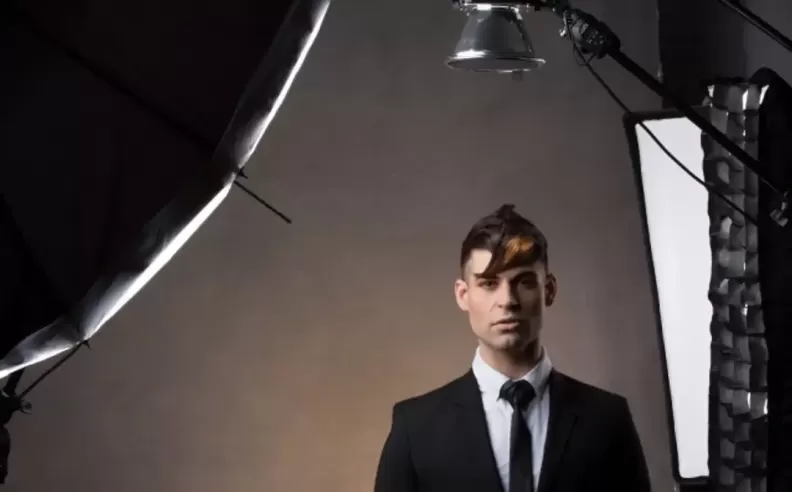
Understanding and mastering the 3-point lighting setup is invaluable for any photographer. This setup provides a solid foundation for creating well-lit, professional portraits. By experimenting with the placement and intensity of each light, photographers can achieve various effects and moods. Even if you don’t specialize in portrait photography, knowledge of lighting techniques enhances your ability to work with light in any photographic context.
Pantelis' guide is a practical resource for photographers looking to improve their lighting skills. By breaking down the process into manageable steps, he demonstrates how to effectively use light to enhance portraits. For more detailed tutorials, visit PJ Pantelis' YouTube channel.
Incorporating these lighting techniques into your photography toolkit will elevate the quality of your work, ensuring your portraits stand out with professional lighting and depth.

Started my career in Automotive Journalism in 2015. Even though I'm a pharmacist, hanging around cars all the time has created a passion for the automotive industry since day 1.
